Greenshot Knowledge Base
Table of Contents
Greenshot Wiki
- What is Greenshot?
- Where to get Greenshot
- How can Greenshot be used?
- Setting Preferences
- Taking Screenshots
- Greenshot Image Editor
- Exporting Screenshots
Videos
- Greenshot Video 1: Taking Better Screenshots
- COMING SOON! Greenshot Video 2: Greenshot Image Editor
- COMING SOON! Greenshot Video 3: Tools in Action (The Deeper Dive)
Tip Sheets!
Download any of our quick tip sheets below!
What is Greenshot?
Greenshot is a screenshot software tool that is lightweight and can quickly capture screenshots. You can then easily edit the screenshot to add highlighting, hide information, or add text, and then export it in many ways such as to your clipboard, or directly to Microsoft Word or Outlook. But one of the really awesome things about Greenshot is that it's completely free!
If you use one of the free screenshot programs in Windows, such as Snipping Tool or Snip & Sketch, the highlighting and markup are shaky. I really recommend going to this program so that your screenshots look professional, especially if you are using them in a business environment.
If you use one of the free screenshot programs in Windows, such as Snipping Tool or Snip & Sketch, the highlighting and markup are shaky. I really recommend going to this program so that your screenshots look professional, especially if you are using them in a business environment.
Where to get Greenshot?
How can Greenshot be used?
- For a teacher, they may use screenshots to show students where to go, what to do, and how to do it - especially if they are utilizing an online learning system.
- For a Tech trainer or support tech, screenshots are absolutely necessary as they need the ability to send screenshots to explain a software process or provide screenshots to fix an issue.
- Office Workers such as executive assistants, secretaries, HR specialists, or any others, could have many reasons to use screenshots. For example, sending screenshots of accounts or information and Greenshot gives them the ability to blur out the private information.
- Even Small business owners find the need to use screenshots depending on their business. For example, taking screenshots to save information for their records, as sometimes it is not easy to print a receipt.
- And because Greenshot is free, it is ideal for Home or School use and is so easy to use, even younger kids can be taught to use it.

Setting Preferences
Access preferences by going to Greenshot in your Notification Area. There are several settings that I recommend.
General Tab
Keyboard shortcuts can be changed, along with the language and update interval.
Capture Tab
Capture Mousepointer - captures the pointer in a separate layer which allows it to be moved or deleted.
Show Magnifier - Take better screenshots by magnifying the corners.
Milliseconds to wait before capture - change how much time it takes before taking a screenshot. This is helpful if you need to click on a menu or another object within the window.
Output Tab
Storage Location – Choose a default location to save to
Filename Pattern – Default includes the Date, Time, and a Title to match what you captured.
Image Format – Choose your preferred format. Choose PNG if you want high-quality images. You can also choose the Greenshot format if you want to save it to edit later. It will keep the mousepointer as a separate layer. Copy file path to clipboard – this will show you where your last image was saved.
Destination Tab
Set a default (or two or three) action after you take a screenshot. Save it automatically and/or open in the image editor to be edited or shared.

Taking Screenshots
You can take screenshots by going to the Greenshot icon in your notification area OR by using keyboard shortcuts. All shortcuts use the Print Screen button.
Keyboard Shortcuts can be changed in Preferences under the General Tab.
Capture region
(Prt Scr) screenshot one specific area on your screen and minimize cropping in the editor.
Capture last region
(Shift + Prt Scr) screenshot the same exact area on your screen like you did the last time.
Capture window
(Alt + Prt Scr) This will capture the active window perfectly with nothing extra to crop out.
Capture full screen
(Ctrl + Prt Scr) This one will capture everything on one screen. If you have multiple screens, you can pick which one or choose both.
Capture window from list
(no shortcut) This will allow you to choose the window to capture from a list.
These options don’t have a shortcut, but you can open them from the Greenshot icon in your taskbar, as shown above.
Open Image from clipboard – This allows you to open any image copied to your clipboard.
Open Image from file – This allows you to open ANY image on your computer into the editor.
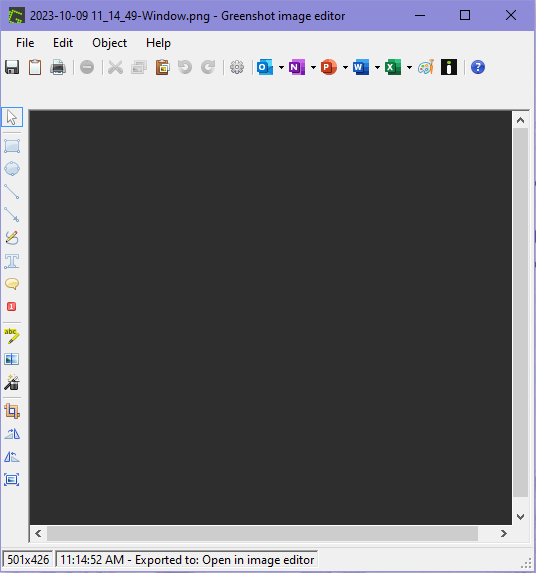
Greenshot Image Editor
Greenshot has many editing tools available in its Image Editor. You can even use these tools on any picture, it doesn't even have to be a screenshot.
Tools Available:
Selection Tool - ESC - used for selecting and moving objectsDraw Rectangle – R - Draw a square or rectangle around an option or specific text
Draw Ellipse – E - Draw a circle or ellipse around an option or specific text
Draw Line – L - Draw a line and change the thickness and color
Draw Arrow – A - Draw an arrow, change the thickness, color, and arrow heads
Draw Freehand – F - Write on your screenshot, requires a steady hand
Textbox – T - Draw a textbox and it can be with a background or transparent
Speech bubble – S - Draw a speech bubble comic book style and input any text
Counters – I - Shows numbered steps, perfect for a process or tech screenshot
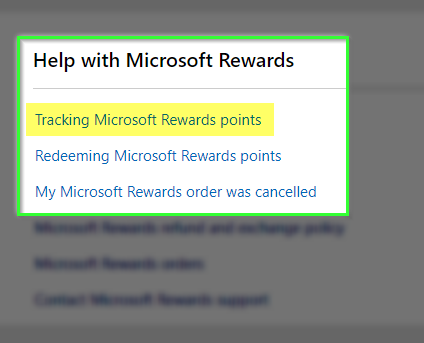
Highlight – H - Highlight area or text, Grayscale, or Magnify
Obscure – O - Hide an area, Pixelize or Blur
Effects - (no shortcut) - Add a border, drop shadow, torn edge, change image to grayscale, or invert the colors
Crop – C - cut off edges or crop your screenshot to make it perfect
Rotate Clockwise – Ctrl + .
Rotate Counterclockwise – Ctrl + ,
Resize (no shortcut) - set an exact size and choose whether or not to change the aspect ratio
Export your Screenshot
There are many ways to export your screenshot when you are ready to share it.
Copy to Clipboard - is a favorite by far. Then you can paste it into any program or document you are working on.
Other ways to export: Print
Share to Program: Outlook, OneNote, PowerPoint, Word, Excel, and MS Paint.
Video 1: Taking Better Screenshots
In this video, we discuss:
- What is Greenshot?
- Uses for Greenshot
- Where to download Greenshot
- Setting Preferences
- Taking a screenshot
Video 2: The Greenshot Image Editor
In this video, we discuss:
- Where to get Greenshot (refresh)
- Setting Preferences (refresh)
- Taking a Screenshot (refresh)
- Overview of all the tools available in Greenshot
Coming Soon!!
Video 3 of the Greenshot Series will be dropping very soon!
Email us at support@pandoracreatesllc.com or subscribe to our YouTube channel to receive notice when it is available!